Category: Guide

  • [Getting Started] Cash Shop/Inventory

    Store: Where Character Support Items Are Sold

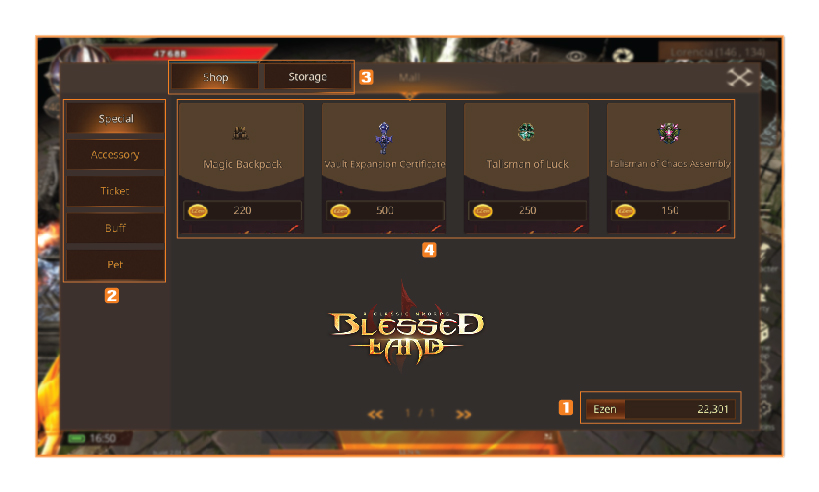
    Quick Access: Open the menu, select the GameShop/Store section.

    At the GameShop – Store Interface:

      1. Ezen: EZen balance (EZen is the currency received when topping up)
      2. Selling categories: Including special items, spells for characters, and pets
      3. Shop: The store displaying items for sale, and Storage is where purchased items are stored
      4. The list of items will be displayed here

  • [Getting Started] Skill & Trade

    How To Get Skill Books?

    You can get skill books from either NPC or Monsters

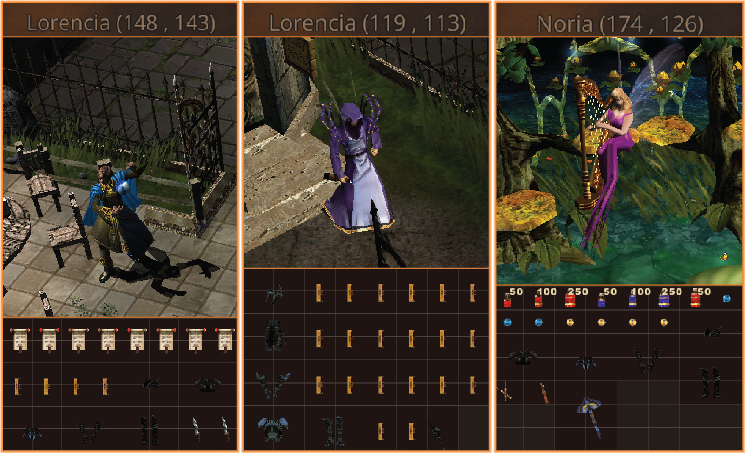
    NPC can be found by coordinate

      • Sell skills DK:
      • Sell skills DW:
      • Sell skills ELF:
      • Sell skills MG:
      • Sell skills DL:
      • Sell Skills RF:
      • Sell Skill SUM:

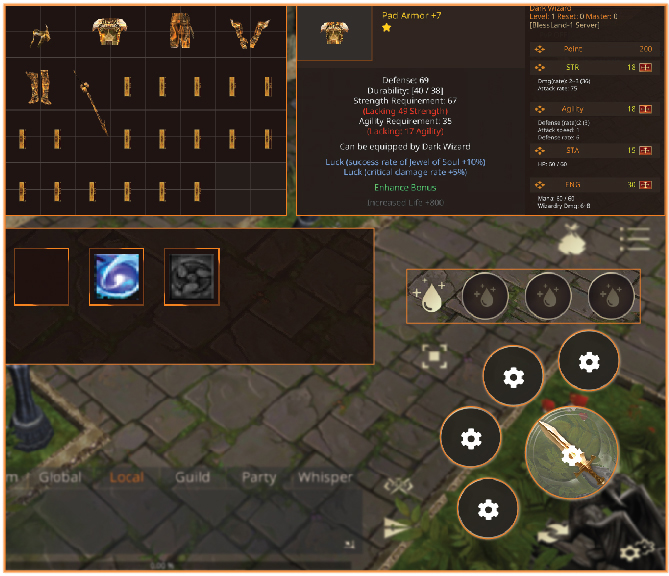
    How To Use Skill Books?

      • Step 1: Purchase skill books from an NPC.
      • Step 2: Click on the skill books to learn skills.
      • Step 3: Click on the skill settings icon to choose a skill to use.
      • Step 4: Click on the skill setup to deal damage to monsters.

    How To Trade With Users?

    Market Channels are available for convenient trade

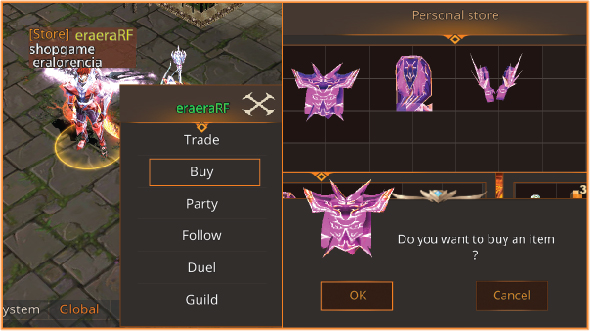
    Item Purchase From Personal Shop

      • Step 1: Dupble click on sellers
      • Step 2: Click on buy button
      • Step 3: Chose item and buy

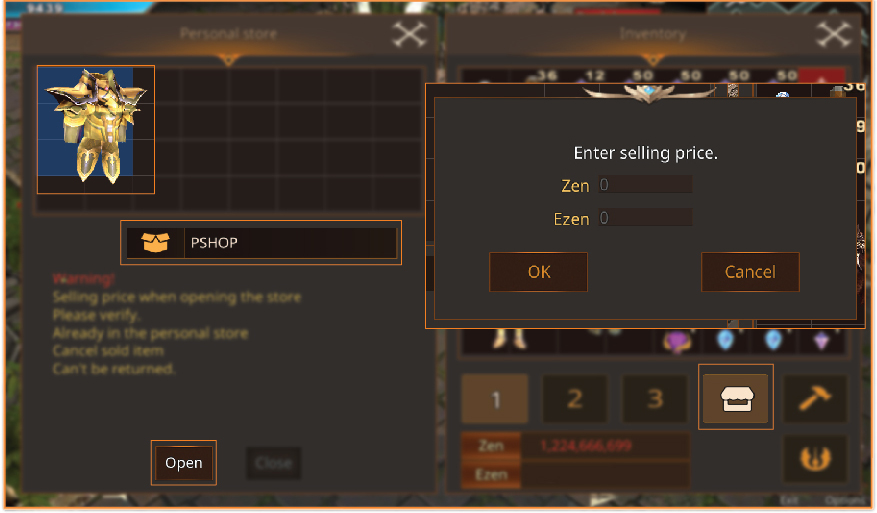
    Item Selling By Opening Personal Shop

      • Step 1: Open Inventory
      • Step 2: Click on personal shop button
      • Step 3: Move items to the personal shop
      • Step 4: Make a title of personal shop
      • Step 5: Put selling price
      • Step 6: Click on ok button
      • Step 7: Open personal shop
  • [Getting Started] Level Up Guide

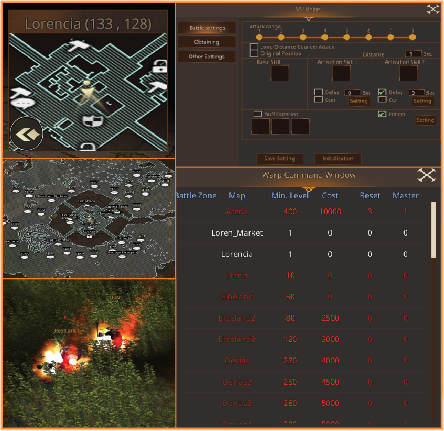
    After selecting the created character, the Lorencia map will appear. Follow the steps below to level up your character:

    Basic Preparation for the Character

      • Step 1: Purchase skills, equipment, weapons, and potions for the character from the NPC.
      • Step 2: Allocate points to learn skills and use equipped weapons.
      • Step 3: Set skills in the action bar and configure auto-potion pumping.

    Upgrading and Setting Up Auto-Mode

      • Step 1: Open the current map, locate VIP spots, and click to move.
      • Step 2: Defeat monsters using pre-set skills.
      • Step 3: When reaching level 80, open the auto panel, set the character to attack and pick up items automatically.
      • Step 4: Once you reach a sufficient level to progress to higher maps, move to higher-level maps to gain more experience.
  • [Getting Started] Auto Hunting Mode

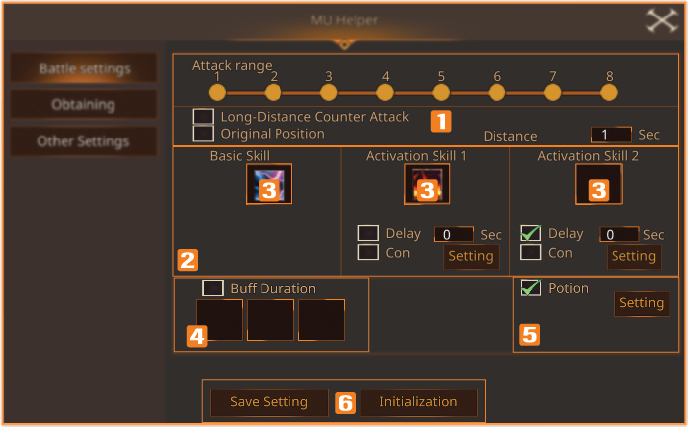
    Auto Attack

      1. Set the attack range.
      2. Configure skills and attack settings.
      3. Select the attack skill from the skill list.
      4. Set up buffs: Choose buffs for teammates.
      5. Configure health potion usage.
      6. Save settings and load settings.

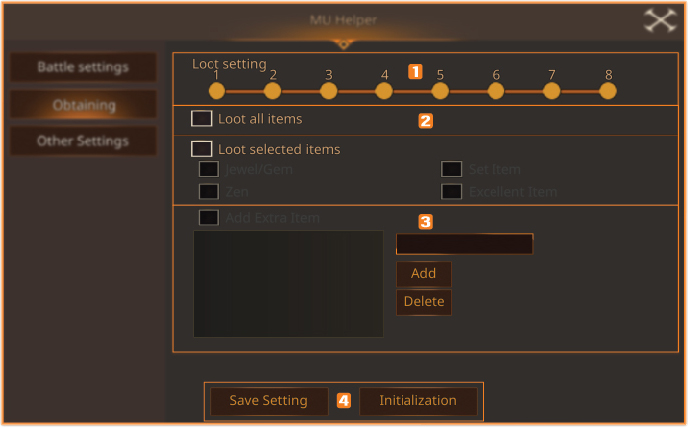
    Auto Pickup

      1. Set the pickup range.
      2. Configure the items to pick up.
      3. Set up additional items to pick up.
      4. Save settings and load settings.

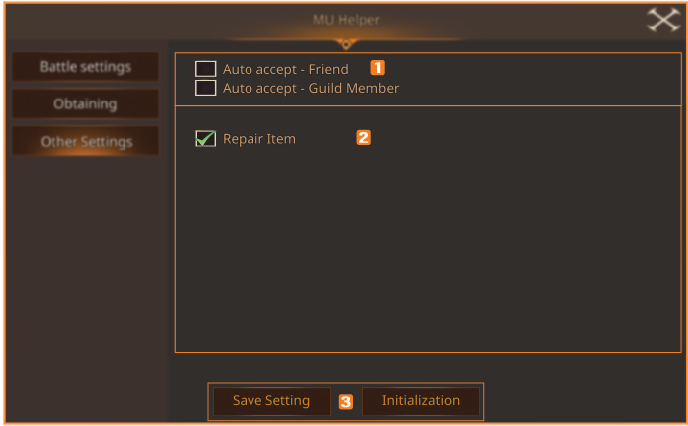
    Other Settings

      1. Configure automatic friend requests and guild member requests.
      2. Set the usage of mana potions and item repairs.
  • [Getting Started] Quest for Beginners

    Missions 1 and 2

    To promote your character to Master level, your character needs to complete missions upon reaching level 220.

    Meet NPC Sebina (Davias- 193,40)
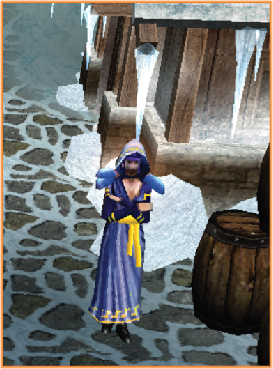
      • Mission Requirement: Submit specific items (available at NPC – Lorencia at coordinates 124, 133)

    After completing these missions, find NPC Marlon Davias – 190,41
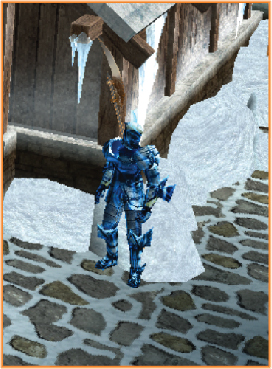
      • Mission Requirement: Submit the Glorious Ring (available at NPC – Lorencia at coordinates 124, 133)

    Master Promotion Mission

    To complete the Master promotion mission, your character must reach level 400.

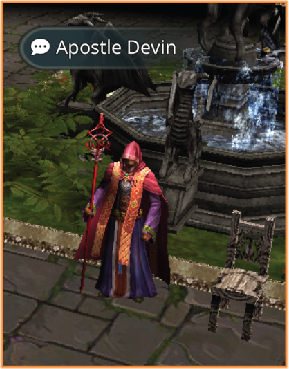
    After that, meet NPC Apostle Devin in Lorencia at coordinates 145, 122.

      • Mission Requirement 1: 5,000,000 Zen
      • Mission Requirement 2: Submit specific items (available at NPC – Lorencia at coordinates 124, 133)
      • Mission Requirement 3: Defeat monsters in Barracks
      • Mission Requirement 4: Defeat Dark Elves in Refuge

    After completing all four missions, your character will be promoted to Master level.
    Access the Master skill menu by selecting the Quick Menu and clicking on the Master Skills section.
  • [Getting Started] Party & Auto Party

    Party

    To participate in various events or support each other in hunting, characters can create a party for assistance.

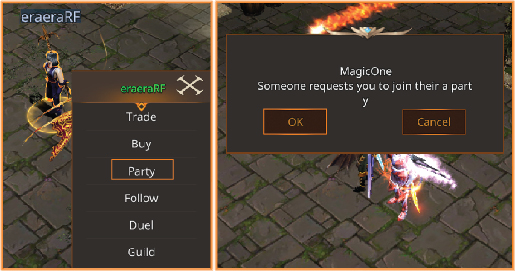
      1. Step 1: Double-click on the character you want to create a party with.
      2. Step 2: In the command panel, select the Party option.
      3. Step 3: Wait for members to confirm to create the party.

    Party Setup, Auto-Join, and Member Acceptance

    To access this feature, click the quick access icon.

      • Access the ‘Party’ section: Current party information
      • Access the ‘Party Searching’ section: party setup and configuration

    In the ‘Party Searching’ section, you will find the following settings:

      1. Party List: List of party available in the sub.
      2. My Party: Configure your party (for party leaders only): Set party privacy, automatic member acceptance, party name, and password.
      3. Waiting List: List of members requesting to join the party ; skip if your party has set automatic member acceptance.
  • [Getting Started] Gremory Case

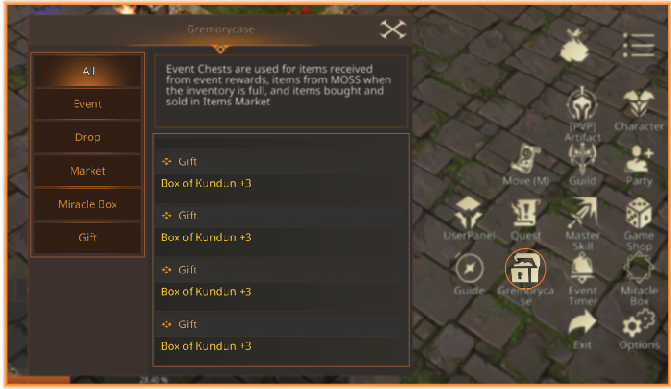
    The Gremory Case is where you can store items from various events.

    To access the Gremory Case, go to the feature menu and select Gremory Case.

    The Gremory Case contains items from the following sources:

      • Events
      • Drops
      • Shopping Market
      • Merchant Moss

    Characters can withdraw items from the personal storage box, delete them, or sell them at NPC shops.

  • [Getting Started] Mysterious Merchant Moss – Miracle Box

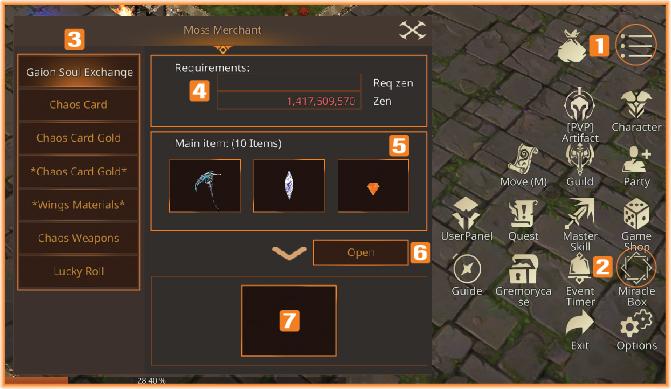
    Mysterious Merchant Moss is where warriors can try their luck with hunted materials.

    Follow these steps to find valuable items:

      1. Open the feature menu
      2. Open the Miracle Box
      3. Find the material category you want to spin
      4. Check the materials and the number of spins
      5. Review the rewards
      6. Press ‘Open’ to spin for items
      7. Display the items received

    Note: Items received will be sent to the Gremory Case.

  • [Event] Chaos Castle

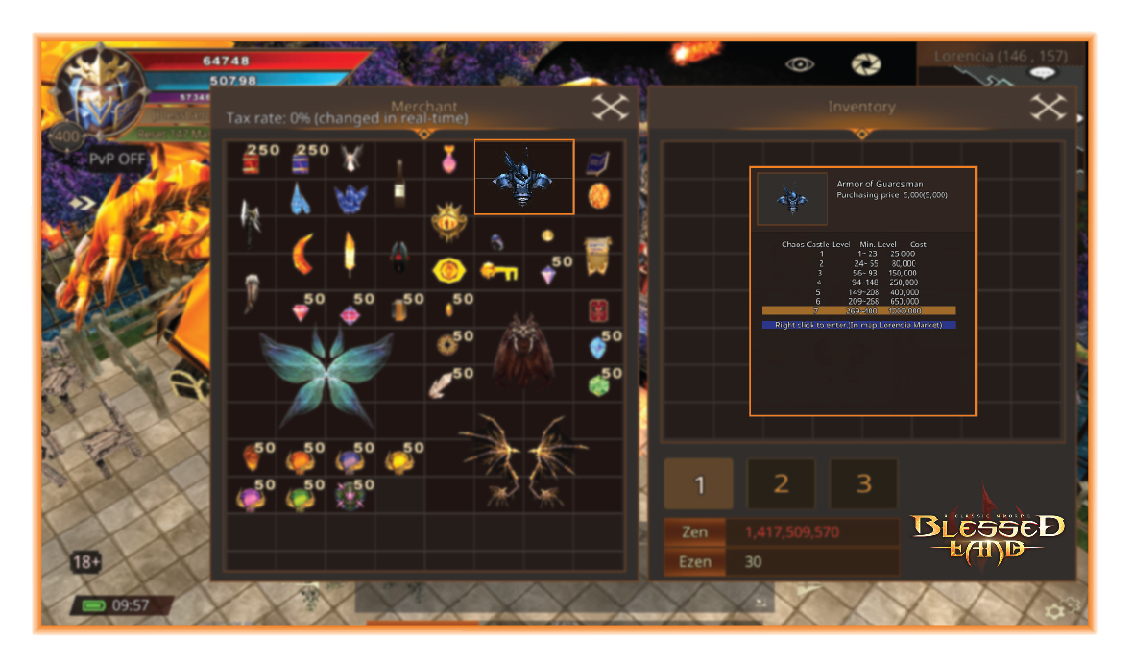
    To obtain a Chaos Castle ticket, characters should visit NPC Lumen at Lorencia coordinates 123,133.

     Armor of Guardsman

    Item Usage

      • It is used to enter Chaos Castle.
      • There is a Zen requirement to enter Chaos Castle.

    Rules

      • At least 2 players must enter to start.
      • If 2 players do not enter, your fee is refunded.
      • Up to 70 players can join in a single instance.
      • You cannot buff another character.
      • Mounts and transformation rings cannot be used.
      • You cannot enter if you are in a Party.
      • You cannot enter if you have PK Status.

    Adjustments

      • ‘Final PVP DMG’ is reduced by 50%.
      • There’s no penalty upon character death.
      • Character name UI is hidden.
      • ‘Character Commands’ are disabled.
      • Chat is disabled once the mini-game starts.
      • Town Portal Scroll will warp you to Devias.
      • If you die, you will be moved to Devias.

    Game Start

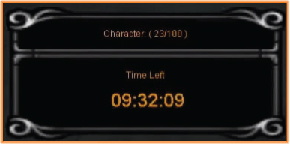
    When the mini-game starts, a group of monsters will spawn in the arena. These monsters will look similar to other players, making it challenging to differentiate between players and monsters. In total, 100 players/monsters will spawn in the arena. The objective is to eliminate all other players/monsters and be the last one standing. A tracker in the lower right corner of the screen will display the remaining number of monsters/players and a 10-minute time limit.

    It’s essential to remember that you can ‘fall off the map’ and die in Chaos Castle. When you kill a monster, it will ‘explode,’ causing a 2-tile knock-back. If you get pushed off the edge of the arena, you will fall to your death.

    Less Than 40 Remaining Players/Monsters

    When there are fewer than 40 players/monsters remaining, the floor around the arena will crumble and disappear. If your character is standing on a tile that disappears, you will fall to your death. One tile around the edge of the arena will disappear when the player/monster count reaches less than 40, 30, 20, and finally when there are fewer than 10 remaining players/monsters.

    Winning Chaos Castle

    Usually, the winner is determined by being the last remaining player standing. However, if the timer reaches zero, the winner is determined by ‘event points.’ Event points are earned by killing players/monsters.

      • +2 event points per monster kill
      • +1 event point per player kill

    Notes & Tips

    When you kill a monster, it will likely ‘explode,’ causing your character to be pushed back 2 tiles. The explosion has a range of two tiles, so you need to be standing at least 3 tiles away to avoid knock-back. Using skills that allow you to attack from a distance can be helpful. You can also resist the explosion’s knock-back effect by equipping a Ring of Fire or Pendant of Fire due to their ‘elemental resistance.

  • [Event] Blood Castle

    The continent of MU is in danger, as the castle of the Archangel of Destiny is being destroyed and looted by Kundun’s forces. In their attack, they have stolen the Sacred Weapons of the Archangel.

    How to Enter Blood Castle?To enter the Blood Castle, you will need to create a Ticket to Blood Castle by using:

      • 1 Archangel Scroll
      • 1 Blood Bone
      • 1 Chaos Gem

    These ingredients must be of the same level to combine and create a Ticket to Blood Castle.

    Rules and Requirements for Entry

      • You need an Archangel Weapon of your character’s level to enter Blood Castle.
      • You cannot enter Blood Castle when you are a murderer.
      • The War command will work inside Blood Castle.
      • Trading is not allowed inside Blood Castle.
      • Only a maximum of 10 players is allowed on each level of Blood Castle.
      • If you die inside Blood Castle, you will not lose experience, Zen, or drop items.
      • Specific skills can be used in the safe zone of Blood Castle (Attack/Defense buffs, healing, soul barrier, health).
    How to Play Inside Blood Castle

      • When you are inside Blood Castle, you must wait for the event to begin. During the waiting period, you can form parties with other players.
      • Once the event starts, players must kill 40 monsters on the bridge, and then they will be able to break the castle doors.
      • After breaking the doors and entering the castle, each hero must defeat 4 Spirit Sorcas to make a crystal statue appear.
      • When the crystal statue appears, you must destroy it to obtain the Archangel Weapon.
      • After collecting the weapon thrown by the statue, you can take it to Archangel and complete the mission. Finally, you will receive your reward.

    Note: In case the winner of Blood Castle wants to share the prize with group members, the player who obtained the Archangel Weapon must first talk to Archangel, and then to the other heroes. In a party, anyone can claim the reward, so be cautious with those you trust.