Category: Getting Started

  • [Getting Started] Quest for Beginners

    Missions 1 and 2

    To promote your character to Master level, your character needs to complete missions upon reaching level 220.

    Meet NPC Sebina (Davias- 193,40)

      • Mission Requirement: Submit specific items (available at NPC – Lorencia at coordinates 124, 133)

    After completing these missions, find NPC Marlon Davias – 190,41

      • Mission Requirement: Submit the Glorious Ring (available at NPC – Lorencia at coordinates 124, 133)

    Master Promotion Mission

    To complete the Master promotion mission, your character must reach level 400.

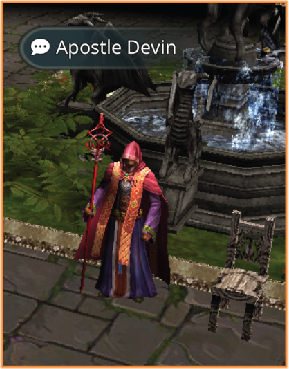
    After that, meet NPC Apostle Devin in Lorencia at coordinates 145, 122.

      • Mission Requirement 1: 5,000,000 Zen
      • Mission Requirement 2: Submit specific items (available at NPC – Lorencia at coordinates 124, 133)
      • Mission Requirement 3: Defeat monsters in Barracks
      • Mission Requirement 4: Defeat Dark Elves in Refuge

    After completing all four missions, your character will be promoted to Master level.

    Access the Master skill menu by selecting the Quick Menu and clicking on the Master Skills section.

  • [Getting Started] Party & Auto Party

    Party

    To participate in various events or support each other in hunting, characters can create a party for assistance.

      1. Step 1: Double-click on the character you want to create a party with.
      2. Step 2: In the command panel, select the Party option.
      3. Step 3: Wait for members to confirm to create the party.

    Party Setup, Auto-Join, and Member Acceptance

    To access this feature, click the quick access icon.

      • Access the ‘Party’ section: Current party information
      • Access the ‘Party Searching’ section: party setup and configuration

    In the ‘Party Searching’ section, you will find the following settings:

      1. Party List: List of party available in the sub.
      2. My Party: Configure your party (for party leaders only): Set party privacy, automatic member acceptance, party name, and password.
      3. Waiting List: List of members requesting to join the party ; skip if your party has set automatic member acceptance.
  • [Getting Started] Gremory Case

    The Gremory Case is where you can store items from various events.

    To access the Gremory Case, go to the feature menu and select Gremory Case.

    The Gremory Case contains items from the following sources:

      • Events
      • Drops
      • Shopping Market
      • Merchant Moss

    Characters can withdraw items from the personal storage box, delete them, or sell them at NPC shops.

  • [Getting Started] Mysterious Merchant Moss – Miracle Box

    Mysterious Merchant Moss is where warriors can try their luck with hunted materials.

    Follow these steps to find valuable items:

      1. Open the feature menu
      2. Open the Miracle Box
      3. Find the material category you want to spin
      4. Check the materials and the number of spins
      5. Review the rewards
      6. Press ‘Open’ to spin for items
      7. Display the items received

    Note: Items received will be sent to the Gremory Case.

  • [Getting Started] Interface Blessed Land

    Here is a detailed description of the interfaces in the game:

    Login Interface

    1. Log In: This button allows you to enter your account information and password to access the game.

    2. Play Now: If you have previously logged in and saved your account, you can press this button to quickly join the game.

    3. Function Shortcut:

      • Home Icon: By clicking here, you can quickly access the game’s homepage.
      • Register Icon: If you don’t have an account, you can use this button to create a new account.
      • Settings Icon: Here, you can adjust the game’s settings such as graphics, sound, and language.

    Character Creation Interface

    1. Create: Use this button to create a new character. You can choose the race and customize the details to create a character to your liking.

    2. Menu: This menu includes a list of features such as selecting a server and configuring other options in the game.

    3. Connect: After you have created a character, press this button to connect to the game with the character you’ve created.

    Character List: Here, you can see a list of all the characters you have created. You can select a character by double-clicking on the name or selecting the character and then pressing the “Connect” button.

    4. Delete: This button allows you to delete a character if you wish.

    In-Game Interface

    1. Character Information: Stats and character details; click on the character avatar to open the feature list.

    2. Quick Access to Quest – Party: Shortcut key to open character quests, search for and set up parties.

    3. Zoom Icon: zoom in and zoom out.

    4. Quick Access to Maps: Access the map list and view character location on the map; click on a location on the map to move to the desired spot.

    5. Menu Icon: Quickly access the feature list.

    6. Quick Setup for Skills, Health Potions, Auto Mode, and Auto Run.

    7. Chat Frame.